

This is the second in our series of articles on 2026’s new Maladum expansions. If you missed the first, you can find it here. The new products are available to pre-order on Gamefound now, via the Kingdom of Hyberia pledge manager. They can be pre-ordered whether you’ve pledged for the terrain or not, and not only will you get them early, but you’ll get them cheaper too!
The Dominion of Ur’Ghaal expansion does not just add new enemies to your campaign – it introduces a whole new way of using magic… The mysterious Hexweavers have the ability to reach beyond the particles that common maladaar call magic. They can draw upon what others may call auras, souls or even fears, manipulating all natural life forces to their will. This is the Aether.
As your games progress, the Hexweaver will use the resources available to it to shift and mutate the battlefield, directing the Aether through its minions and granting them powerful abilities. However, it is your Adventurers that determine what resources are available, so every action must be carefully considered. Let’s explore how this strange energy manifests in your games.
The Aether
In a regular game of Maladum, your Adventurer’s stats and other game effects are tracked with coloured pegs, but it’s the blue magic pegs that have the greatest impact. The more you use, the more attention you draw to yourself, and the harder the game becomes.
The Urmeck, however, don’t just draw on your magic. Against the Urmeck, blue pegs are no longer added to the Dread tracker, but they are not discarded. They, along with any purple Skill pegs you use and green Health pegs you lose, come under the Hexweaver’s power. Every effort you make; all the energy you expend, becomes fuel for foul Urmeck sorcery.
All of this is controlled through an ominous new feature: The Cauldron.
The Cauldron
The Cauldron is the physical focus of the Hexweaver’s power, a vessel of swirling Aether that hums with raw energy. It is represented by a striking new terrain piece that is physically filled with coloured pegs as the game goes on.

Whenever you face the Urmeck the Cauldron is always in use. In some quests, it appears directly on the gaming area as an interactive feature. In others, it sits to the side of the gaming area, tracking the Aether’s volatile flow.
The Cauldron is a magical reservoir for all spent energy. Any peg that is spent or discarded for any reason (including Magic pegs used to cast spells, or even black pegs removed from the Dread Tracker) is placed into the Cauldron. Each quest begins with a specific mix of pegs, setting the tone for the type of magic dominating the dungeon.
Stir the Cauldron
The Cauldron’s power comes alive during a new step in the Dread Phase: Stir the Cauldron.
After increasing Dread but before drawing an Event Card, the first player draws a random peg from the Cauldron and places it into the relevant position around the rim. The colour drawn determines the effect for that round.
Blue magic pegs that you’ve spent are channelled back through the Urmeck Adversaries, Blessing them, while the fears that you thought were dispelled for good by removing black pegs come back to haunt you, Cursing* your Adventurers! You may try to gain the upper hand by spending purple pegs, but the Urmeck will react accordingly, gaining extra dice in combat. Worst of all, drawing a green peg will prevent your Adventurers from rolling the powerful blue die this round!
As the battle rages and more pegs are added, the Cauldron’s behaviour becomes increasingly unpredictable. Some effects will also draw multiple pegs in a single round! What begins as a trickle of magical interference can quickly erupt into total chaos. You will need to keep a close eye on which colours dominate the Cauldron. If you notice too many of one type, find ways to counterbalance it before the next round or brace yourself for disaster.
*For players who haven’t picked up The Forbidden Creed yet, Curse is the opposite to the Bless status effect. Instead of allowing you to re-roll unlucky dice, Curse forces you to re-roll your successful dice!
The Advancing Horde
The pegs in the Cauldron don’t just determine magical effects – they determine which of the Hexweaver’s creatures are sent into battle! The peg drawn each round will influence the arrivals in the Adversary Phase.

Show off your Skills by using purple pegs and the Hexweaver will react accordingly, sending its powerful Brutes into the fray, whereas if lots of blood has been spilled, green pegs will attract the thirsty Ripclaws…
Blue pegs have a relatively weaker effect, drawing more of the rank and file Wretches – certainly an incentive for you to use more magic and dilute the pool with blue pegs!
Finally, the rarer black pegs allow the Hexweaver to call upon the forces of nature, bringing a random Wandering Beast into play under Urmeck control. No longer can you rely on a Wandering Beast to be a distraction for your enemies – this time it marches alongside them!
For more on the Urmeck Adversary types, see our previous article.
The Hexweaver
At the centre of this power stands the Hexweaver, the new Adversary Commander introduced in Dominion of Ur’Ghaal.
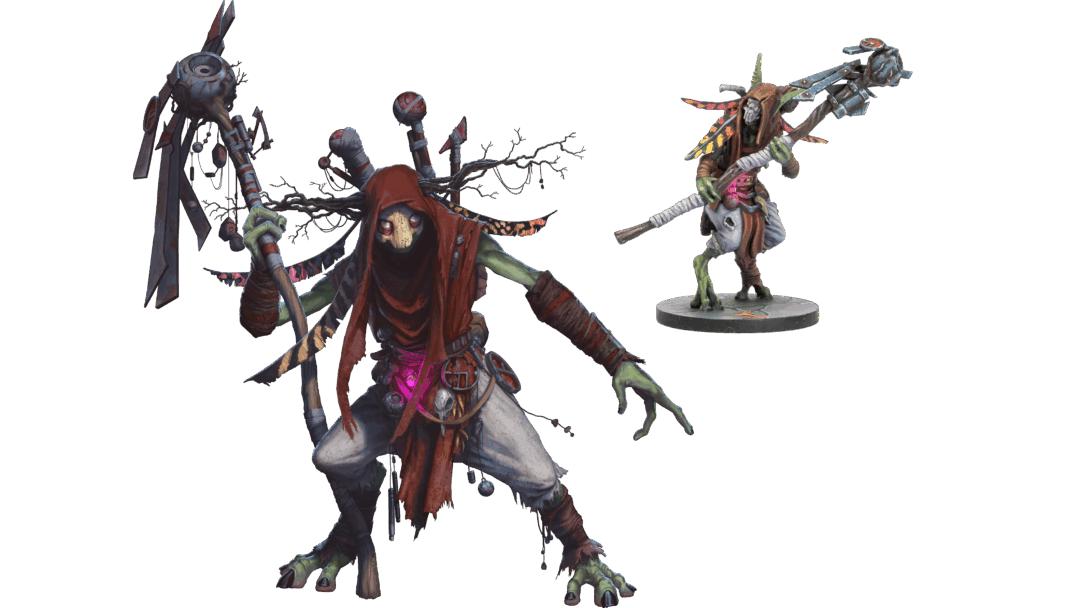
Though a Hexweaver may resemble other Urmeck, it is not of their kind. Its lineage is far older, and over countless generations, it has warped flesh and mind alike, shaping the Urmeck into what they are now. They gorge themselves on Maladum and drape their bodies in enchanted relics. The Hexweavers command, and without question the Urmeck obey. To the Urmeck, the Hexweaver is shaman, healer, prophet, and soothsayer—the ultimate authority on spirit, fate, and magic.
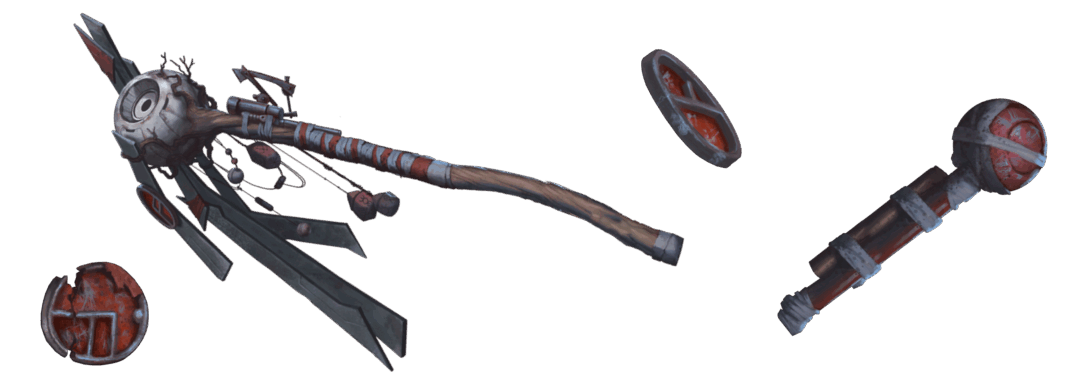
Equipment
Much like the Malagaunt, the Hexweaver draws from a personal armoury of equipment when it enters play. However, where the Malagaunt enters play with one equipment token, the Hexweaver has three (randomly chosen from the six available). Furthermore, they are not just trophies for defeating it – the Hexweaver can use the considerable power of its equipment in battle. The effects range from regenerating its Magic pegs, to powerful ranged attacks, to granting it more actions! This is just another feature of Maladum’s immense replayability, ensuring every encounter feels distinct.
Master of the Aether
While in play, the Hexweaver has complete dominance over the Aether. When Stirring the Cauldron, it draws two pegs instead of one, and both effects resolve. It then rolls the Aether die…
The Aether Die
The Aether Die is a brand-new eight-sided die used whenever the Hexweaver is in play, and for various other effects. Its faces feature the four peg colours (each appearing twice).

While the Hexweaver is in play, after Stirring the Cauldron the Aether Die is rolled. If the colour rolled matches any peg currently in the Cauldron’s rim, an additional magical effect is triggered, centred around the Hexweaver. These effects range from extending the Bless and Curse effects of the blue and black pegs, to allowing nearby Adversaries to bolster their attack and defence capabilities with the Hexweaver’s own Magic pegs.
The Aether Die ensures that no turn feels safe. Even when you think you have accounted for the Cauldron’s chaos, one lucky (or unlucky) roll can undo all your careful planning.
Designer’s Note: The Aether Die is also numbered 1-8 so can function as a conventional D8. It offers a convenient way to randomise between either four or eight different results when needed (such as picking an Adventurer from your party or a side of the gaming area), where a regular six-sided die would be impractical.
Manipulating the Aether
Adding pegs to the Cauldron is easy, but there are ways to remove them too.
Scattered across the battlefield you will occasionally find Urmeck Totems, strange devices that hum in resonance with the Cauldron. There are four in total, one for each peg colour.
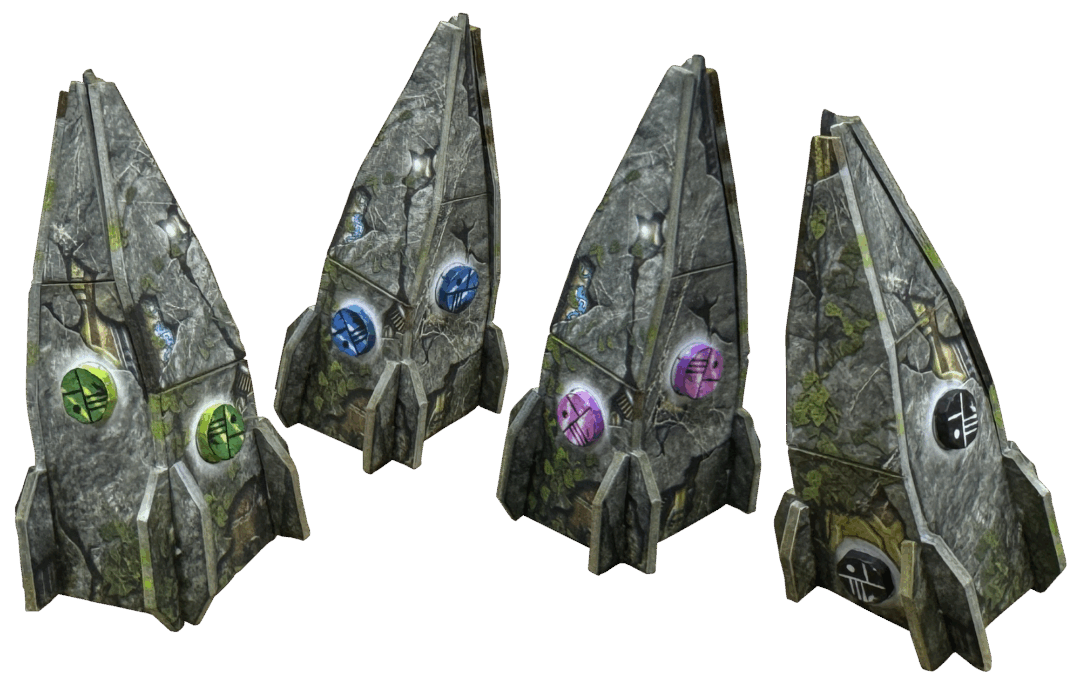
These Totems function as conduits through which the Hexweaver gathers Aetheric power, but clever Adventurers can also exploit them, though not without peril. By Interacting with a Totem, an Adventurer can remove a corresponding peg from the Cauldron. This allows players to influence which pegs remain inside and, by extension, manipulate the outcome of future Stir the Cauldron effects.
However, tampering with aetheric forces is not for the faint-hearted. Depending on the peg removed, your Adventurer will become Cursed, Fatigued, Poisoned or Terrified. This makes interfering with the totems a dangerous gamble that rewards only the brave, or the desperate.
When on the gaming area, the Cauldron can be Interacted with in the same way to remove a peg of any colour. Such direct interference with the Hexweaver’s power also allows the Adventurer to potentially avoid the negative effects, based on a roll of the Aether Die.
Facing the Aether
Defeating the Urmeck is no small feat. Success requires both foresight and adaptability. Adventurers will need to manage their resources carefully, think strategically about when to spend pegs, and when to risk manipulating the Cauldron’s contents.
Everything you do adds a consequence to the Cauldron, resulting in a very different gameplay experience. Every choice matters. In the Dominion of Ur’Ghaal, even the air hums with magic… and it is not on your side.
It’s not all bad though – in our next article we’ll take a look at the Riders of Hyberia expansion which offers some exciting new choices for your Adventurers!


Heath
January 13, 2026 at 11:08 pm
Will we be able to play as or recruit the Urmeck? I sure hope so because that would be bad a$$.
Yodamann
January 13, 2026 at 2:13 pm
Woa, can’t wait!